Home
Vegetarian Wellington
Takes two hours to complete.
Ingredients:-
- 1 small butternut squash , halved lengthways and seeds scraped out
- olive oil
- 1 small dried red chilli , crumbled
- ½ teaspoon ground cinnamon
- 1 tablespoon coriander seeds
- 1 sprig fresh rosemary , leaves picked and chopped
- 2 red onions , peeled and sliced
- sea salt
- freshly ground black pepper
- 1 small bunch fresh sage , leaves picked
- 100 g vac-packed chestnuts , crumbled
- 2 slices sourdough bread
- 3 cloves garlic , peeled
- 1 lemon
- 20 g butter
- 250 g chestnut mushrooms , finely sliced
- 200 g Swiss chard or spinach , washed
- 50 g pine nuts
- 25 g sultanas
- 500 g all butter puff pastry
- 1 free-range egg
- 1 splash milk
Method:-
- Preheat the oven to 200ºC/400ºF/gas 6. Slice the squash lengthways into wedges and add to a large roasting tray with a good splash of olive oil, the chilli and cinnamon. Bash the coriander seeds in a pestle and mortar until fine, then add the rosemary leaves and bash again for 1 to 2 minutes to release its flavour. Scatter over the squash and toss together so that each piece of squash is well coated with the seasoning. Make sure all the squash is skin-side down, then cover with tin foil and bake in the hot oven for around 45 minutes or until soft. Allow to cool, then tear into bite-sized chunks.
- Meanwhile, heat a saucepan over a medium heat, then add a splash of olive oil and the onions. Season well with salt and pepper and cook gently, stirring occasionally, until softened and lightly browned. Add the sage and crumbled chestnuts to the pan for the last few minutes of cooking.
- While that’s happening, toast the bread on a hot griddle pan or in a toaster and rub well with one of the cloves of garlic. Tear into small chunks, and once the onions are done, add the toast to the pan. Turn the heat off, stir everything together, taste, then season and grate in the zest of the lemon.
- Add the butter to a frying pan on a medium heat and when melted, add the mushrooms and a chopped clove of garlic. Fry until soft and quite dry. Squeeze in a little lemon juice, tip into a food processor and whiz until smooth.
- Bring a large pan of salted water to the boil, add the spinach and cook until soft. Drain in a colander, pressing lightly to get rid of excess moisture, then place to one side.
- Slice the remaining garlic clove and add to a frying pan with a splash of olive oil. Fry until golden. Add the pine nuts, sultanas and spinach and fry everything together until warmed through. Season well with salt and pepper and turn off the heat.
- Now assemble your Wellington. Roll out the puff pastry on a sheet of baking parchment until it’s about 30cm x 40cm, then spread the mushroom mixture all over it. In a large bowl, lightly toss together the spinach, squash and onion-bread mixture, then spoon it in a thick line down the middle of the pastry. Leave a space free at either side so you can roll the pastry around the filling.
- To do this, hold one side of the baking parchment and lift it, with the pastry, towards the centre of the Wellington so it starts to cover the filling. Peel the baking parchment back, leaving the pastry in place, then do the same with the other side. The pastry should overlap in the middle. Beat the egg with the milk and brush it over the pastry join to seal the join. Fold up the ends so the filling doesn’t leak out, then carefully roll the Wellington onto a baking sheet, with the seal underneath. Brush all over with the egg mix.
- Bake for 45 minutes until puffed up, golden brown and hot through. Serve carved into thick chunks – it’s fantastic served with veggie gravy.
- Details
- Written by Adrian
- Category: Vegey Meals
- Hits: 1602
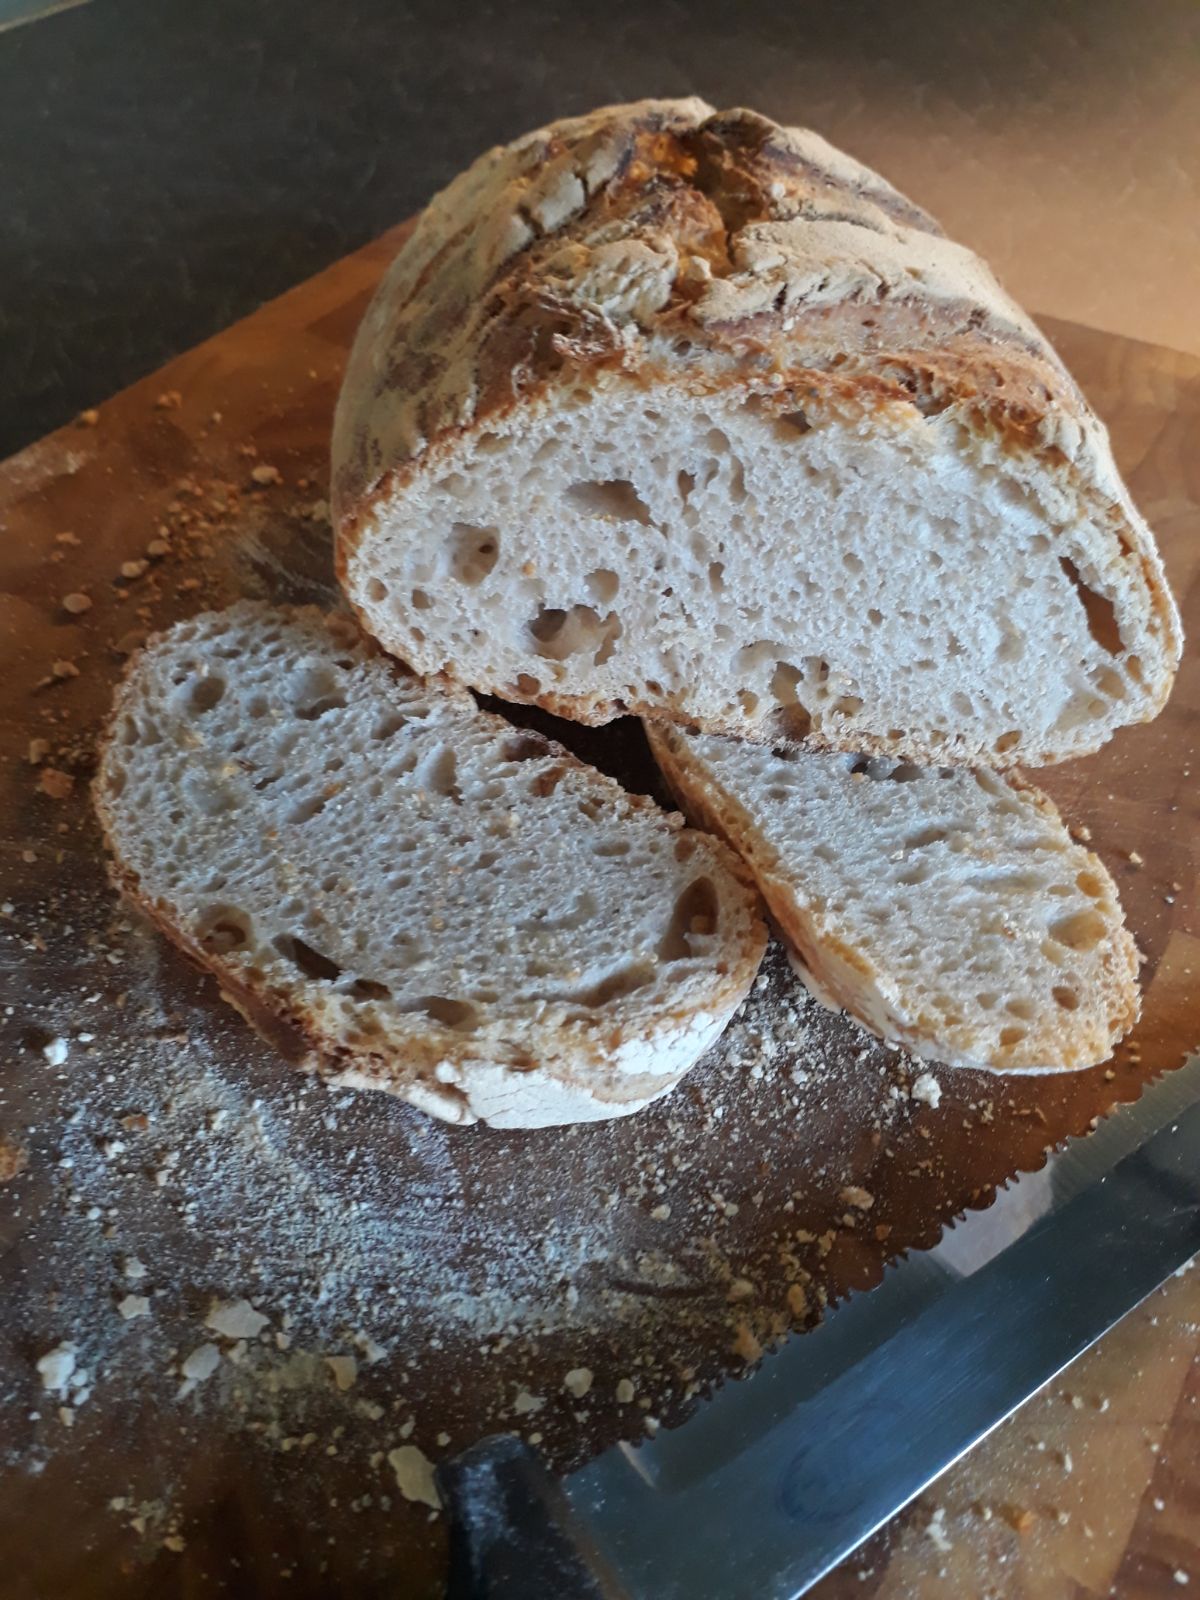
Quick Sourdough Bread - with kneading. Preferred Quick Recipe
Based on a Hollywood recipe but changed to allow first prove in the fridge overnight.
This was a nice bread but lacked the sour taste. It was the most similar to 'normal' bread of all the recipes to date. Julie's favourite to date but I preferred the long prove method.
Overall 1 hour bake - a lot of flour from the prove basket on the loaf.
Nice crumb but could do with more big holes. Taste lacking sourness of longer proven bread.
Ingredients:-
- 375g/13oz strong white flour, plus extra for dusting
- 250g/9oz sourdough starter
- 7.5g salt
- 130-175ml/4-6fl oz tepid water
- olive oil, for kneading
Method:-
The evening before baking:
- Combine the flour, starter and salt in a large mixing bowl. Add the water, a little at a time, and mix with your hands to make a soft dough (you may not need all of the water).
- Coat a chopping board or work surface with olive oil, then tip the dough onto it and knead the dough for 10-15 minutes, or until the dough forms is smooth and elastic.
- Tip the dough into a lightly oiled bowl and cover with cling film.
- Leave to rise in a warm place for up to five hours, or until at least doubled in size - can place in the fridge overnight in the middle of this proving. I did an hour in the warm before fridge overnight and then a few hours in the warm again.
Breakfast on the day of baking
- Take out of the fridge and return to warm place for rest of proving.
Lunchtime on the day of baking:
- Knead the dough until it’s smooth, knocking the air out. Roll into a ball and dust with flour.
- Tip the dough into a well-floured round banneton or proving basket and leave to rise for 4-8 hours.
The bake:
- Use a Dutch Oven and heat the oven to Gas Mark 9.
- Cut the top of the loaf after gently rolling it into the Dutch Oven.
- Gently tip the risen dough onto a lined baking tray.
- Bake the loaf for 30 minutes at this heat, then reduce the heat to Gas Mark 8. Remove the lid from the Dutch Oven and bake for a further 15-30 minutes.
- I use a long bake to get the crust very dark brown.
Cool on a cooling rack.
- Details
- Written by Adrian
- Category: Breads
- Hits: 1823
Canederli, the Italian Knödel
Yield: 5-6 servings
Total Time: 2 hours, 20 minutes
Prep Time: 2 hours
Cook Time: 20 minutes
Ingredients:-
- 300 g (10 oz) stale bread, diced (which can be obtained by dicing 450 g of fresh bread and laying it on a perforated tray for 24 hours, covered with a tea towel)
- 225 ml (1 cup) milk
- 3 eggs, lightly beaten
- 60 g (½ cup) white flour
- 3 Tbsp (minced) flat leaf parsley
- 200 g (7 oz) cheese, e.g.: Fontina, Raclette (smoked or plain), or Gouda (smoked or plain), diced
- 45 g (3 Tbsp) unsalted butter
- 1 ½ Tbsp olive oil
- 1 onion, finely chopped
- ½ tsp salt
- ¼ tsp pepper
- ¼ tsp nutmeg
- 3 liters (12 cups) of vegetable stock (for boiling)
- 20 g (1 ½ Tbsp) per serving of unsalted butter
- 10 g (2 tsp) per serving of grated Parmigiano
- 1 small bunch of chives, thinly sliced
- 1 cup per serving of extra vegetable stock
- Some grated Parmigiano
- Some chives, thinly sliced (optional)
Ingredients:-
For the dumplings
To serve them 'dry'
To serve them in broth
Method:-
- Put the stale bread into a large mixing bowl (1). Add the milk (2), the eggs (3), as well as salt, pepper and nutmeg.
- Mix well and let it rest for at least two hours, covered with a tea towel, in a cool place or in the fridge. Stir occasionally to ensure that the mix absorbs the liquid uniformly.
- After the two hours, add the flour (4), then the parsley (5), and the cheese (6). Mix gently.
- Finely chop the onion (7) and fry it in oil and butter for ten minutes at medium heat, stirring occasionally.
- Let the onion cool off (8), then incorporate it into the mix (9).
- Let the mixture rest for another half an hour covered with a tea towel. It should look uniformly moist and slightly sticky.
- Using your hands, form the canederli by pressing together enough of the mix to make balls the size of a small orange (60 to 80 grams). You should be able produce 14-16 balls out of the entire mix.
- After making each ball, roll it in flour to seal the outside and prevent the canederli from sticking to each other (10).
- When all the canederli are ready, re-roll them into flour and compress them a second time (11).
- Have the vegetable stock in a large pot, well boiling on the stove.
- Place the canederli gently in the pot (12-13), wait until the boil is resumed (14).
- Boil the canederli for 12-15 minutes (they will be floating the whole time), then drain them gently.
- If serving the canederli 'dry', warm up the butter just enough to melt it. Place 3 canederli into each plate, pour the melted butter on them, then sprinkle with some thin-sliced chives, a generous amount of grated Parmigiano, and some freshly ground black pepper.
- If serving the canederli in broth, prepare more vegetable stock (as the one used for boiling will be cloudy because of the flour). Place one or two canederli into each bowl, then pour the broth on them. Finish with some grated Parmigiano and (optional) chives.
Note:-
Note: once boiled, the canederli can be stored in the fridge for up to 3 days, or in the freezer for up to 2 weeks.
If serving the canederli in broth, prepare more vegetable stock (as the one used for boiling will be cloudy because of the flour). Place one or two canederli into each bowl, then pour the broth on them. Finish with some grated Parmigiano and (optional) chives.
- Details
- Written by Adrian
- Category: Soups
- Hits: 1412
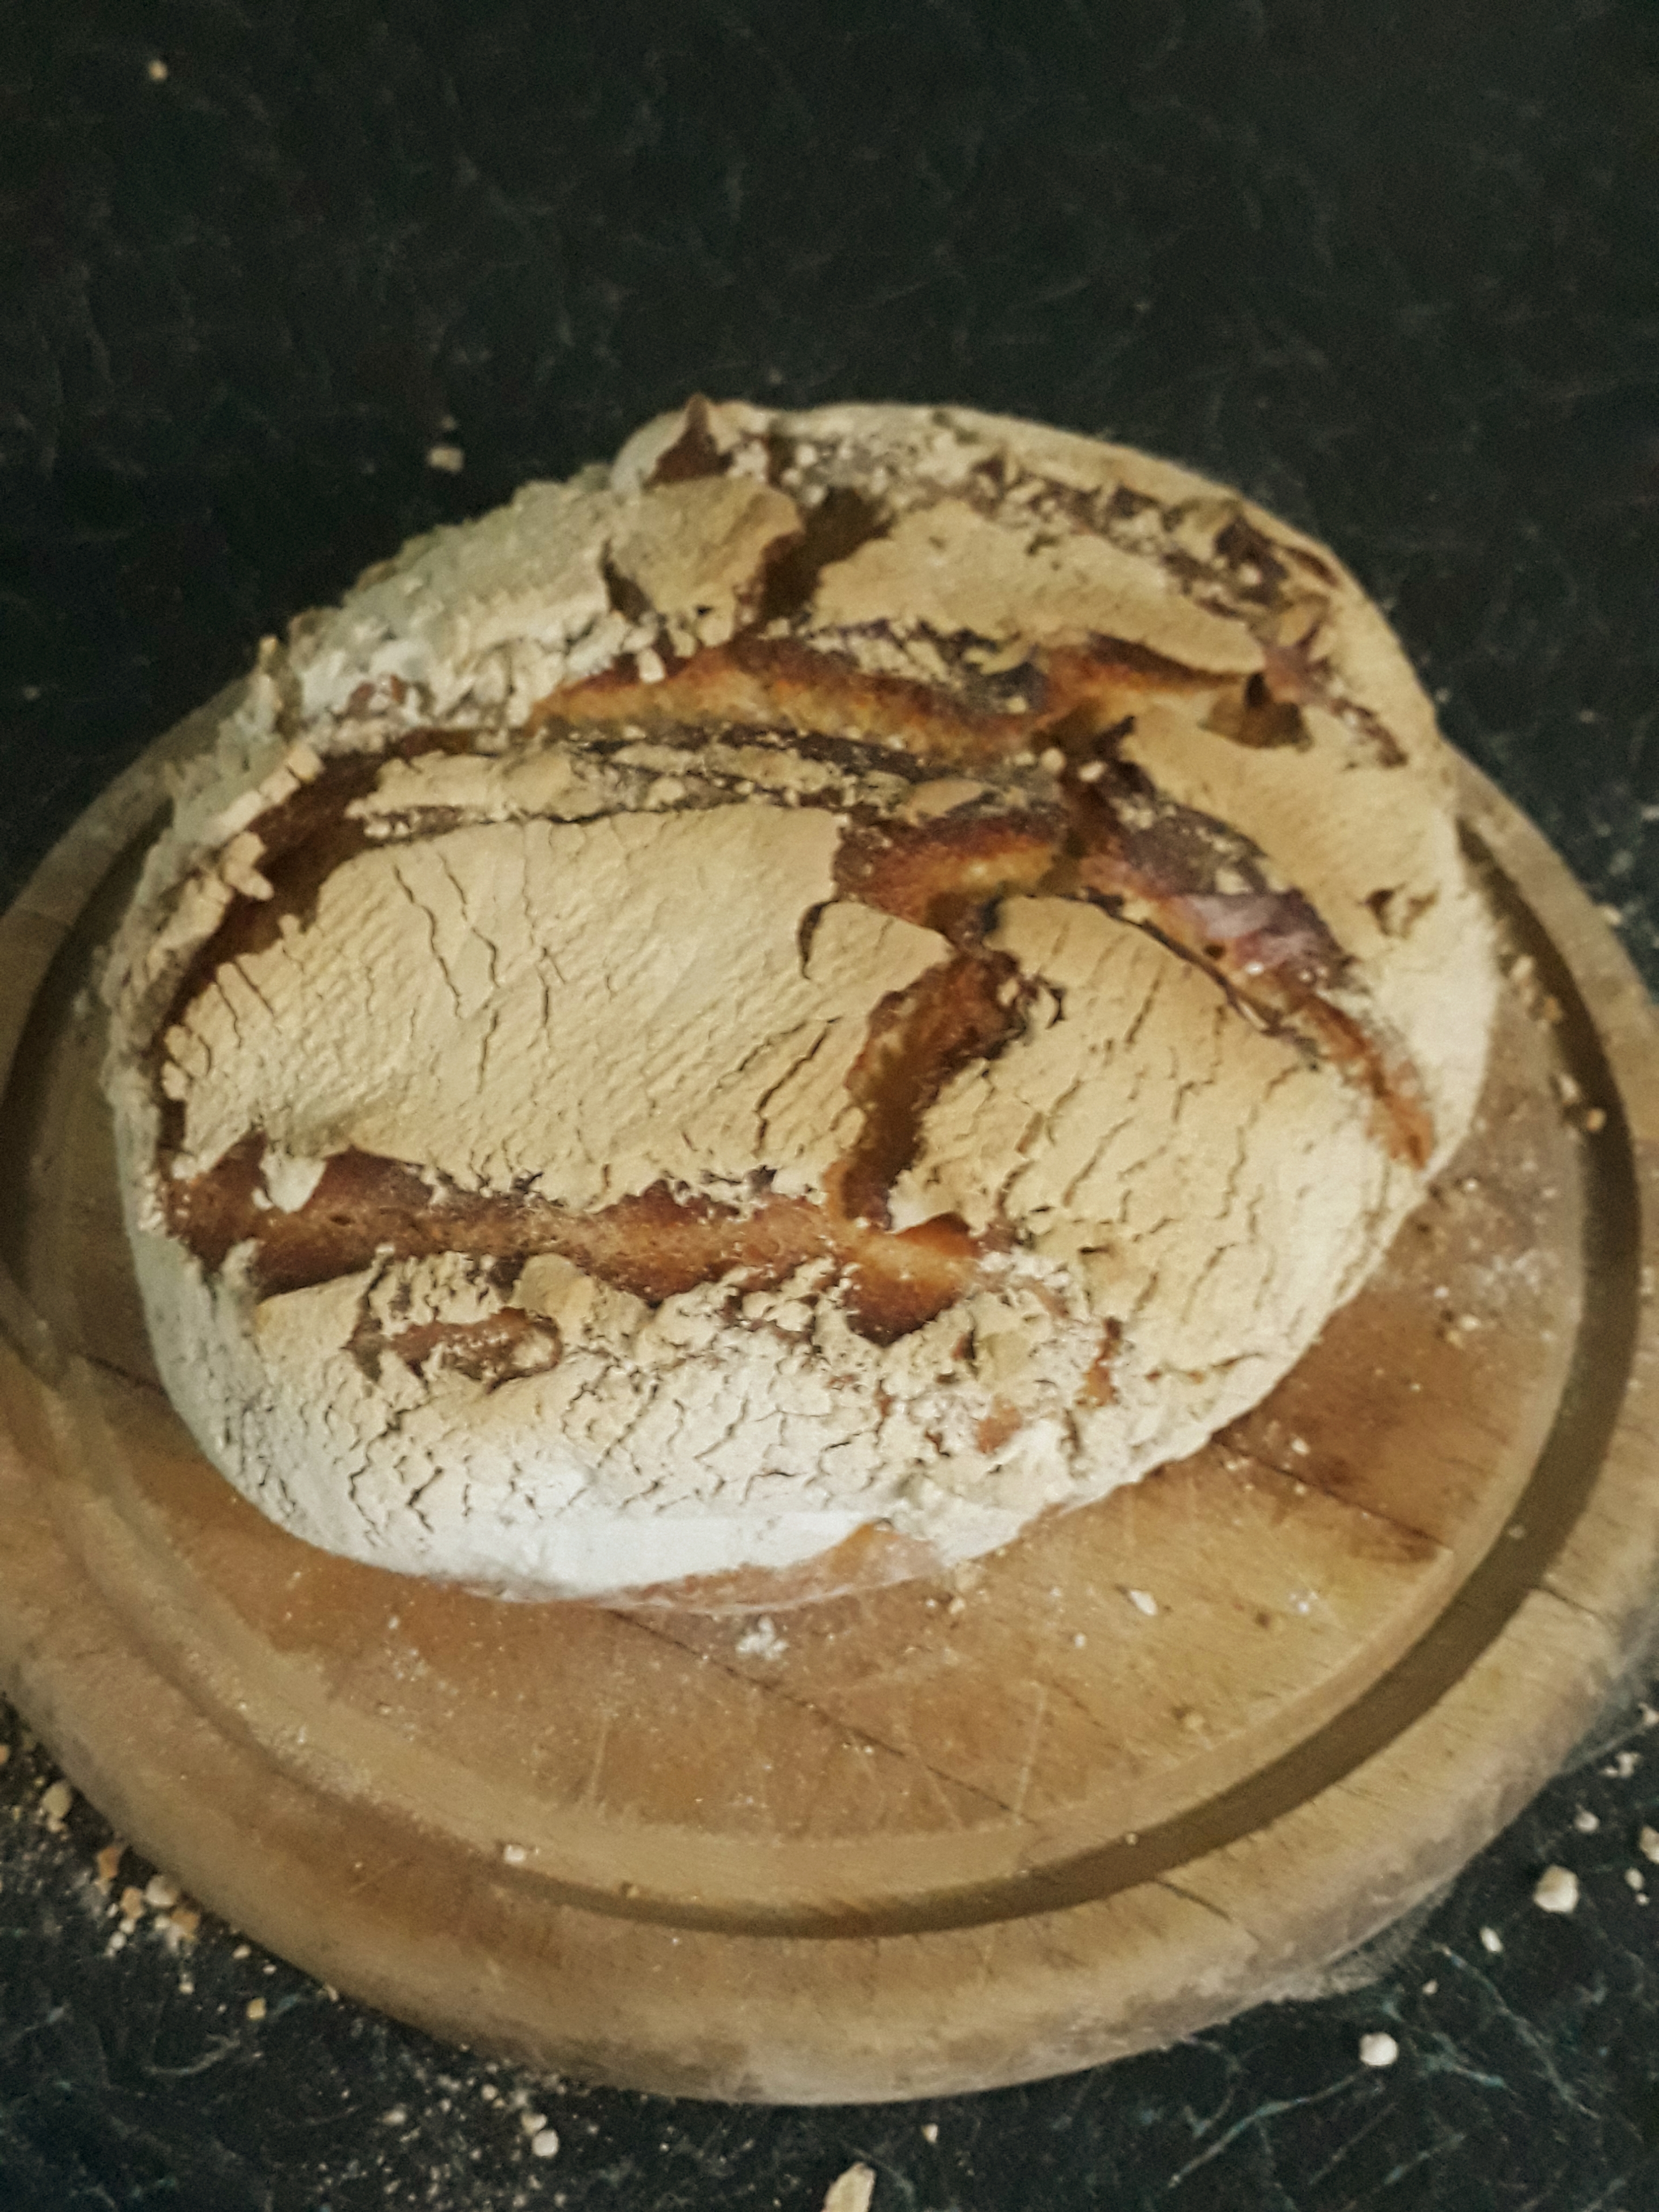
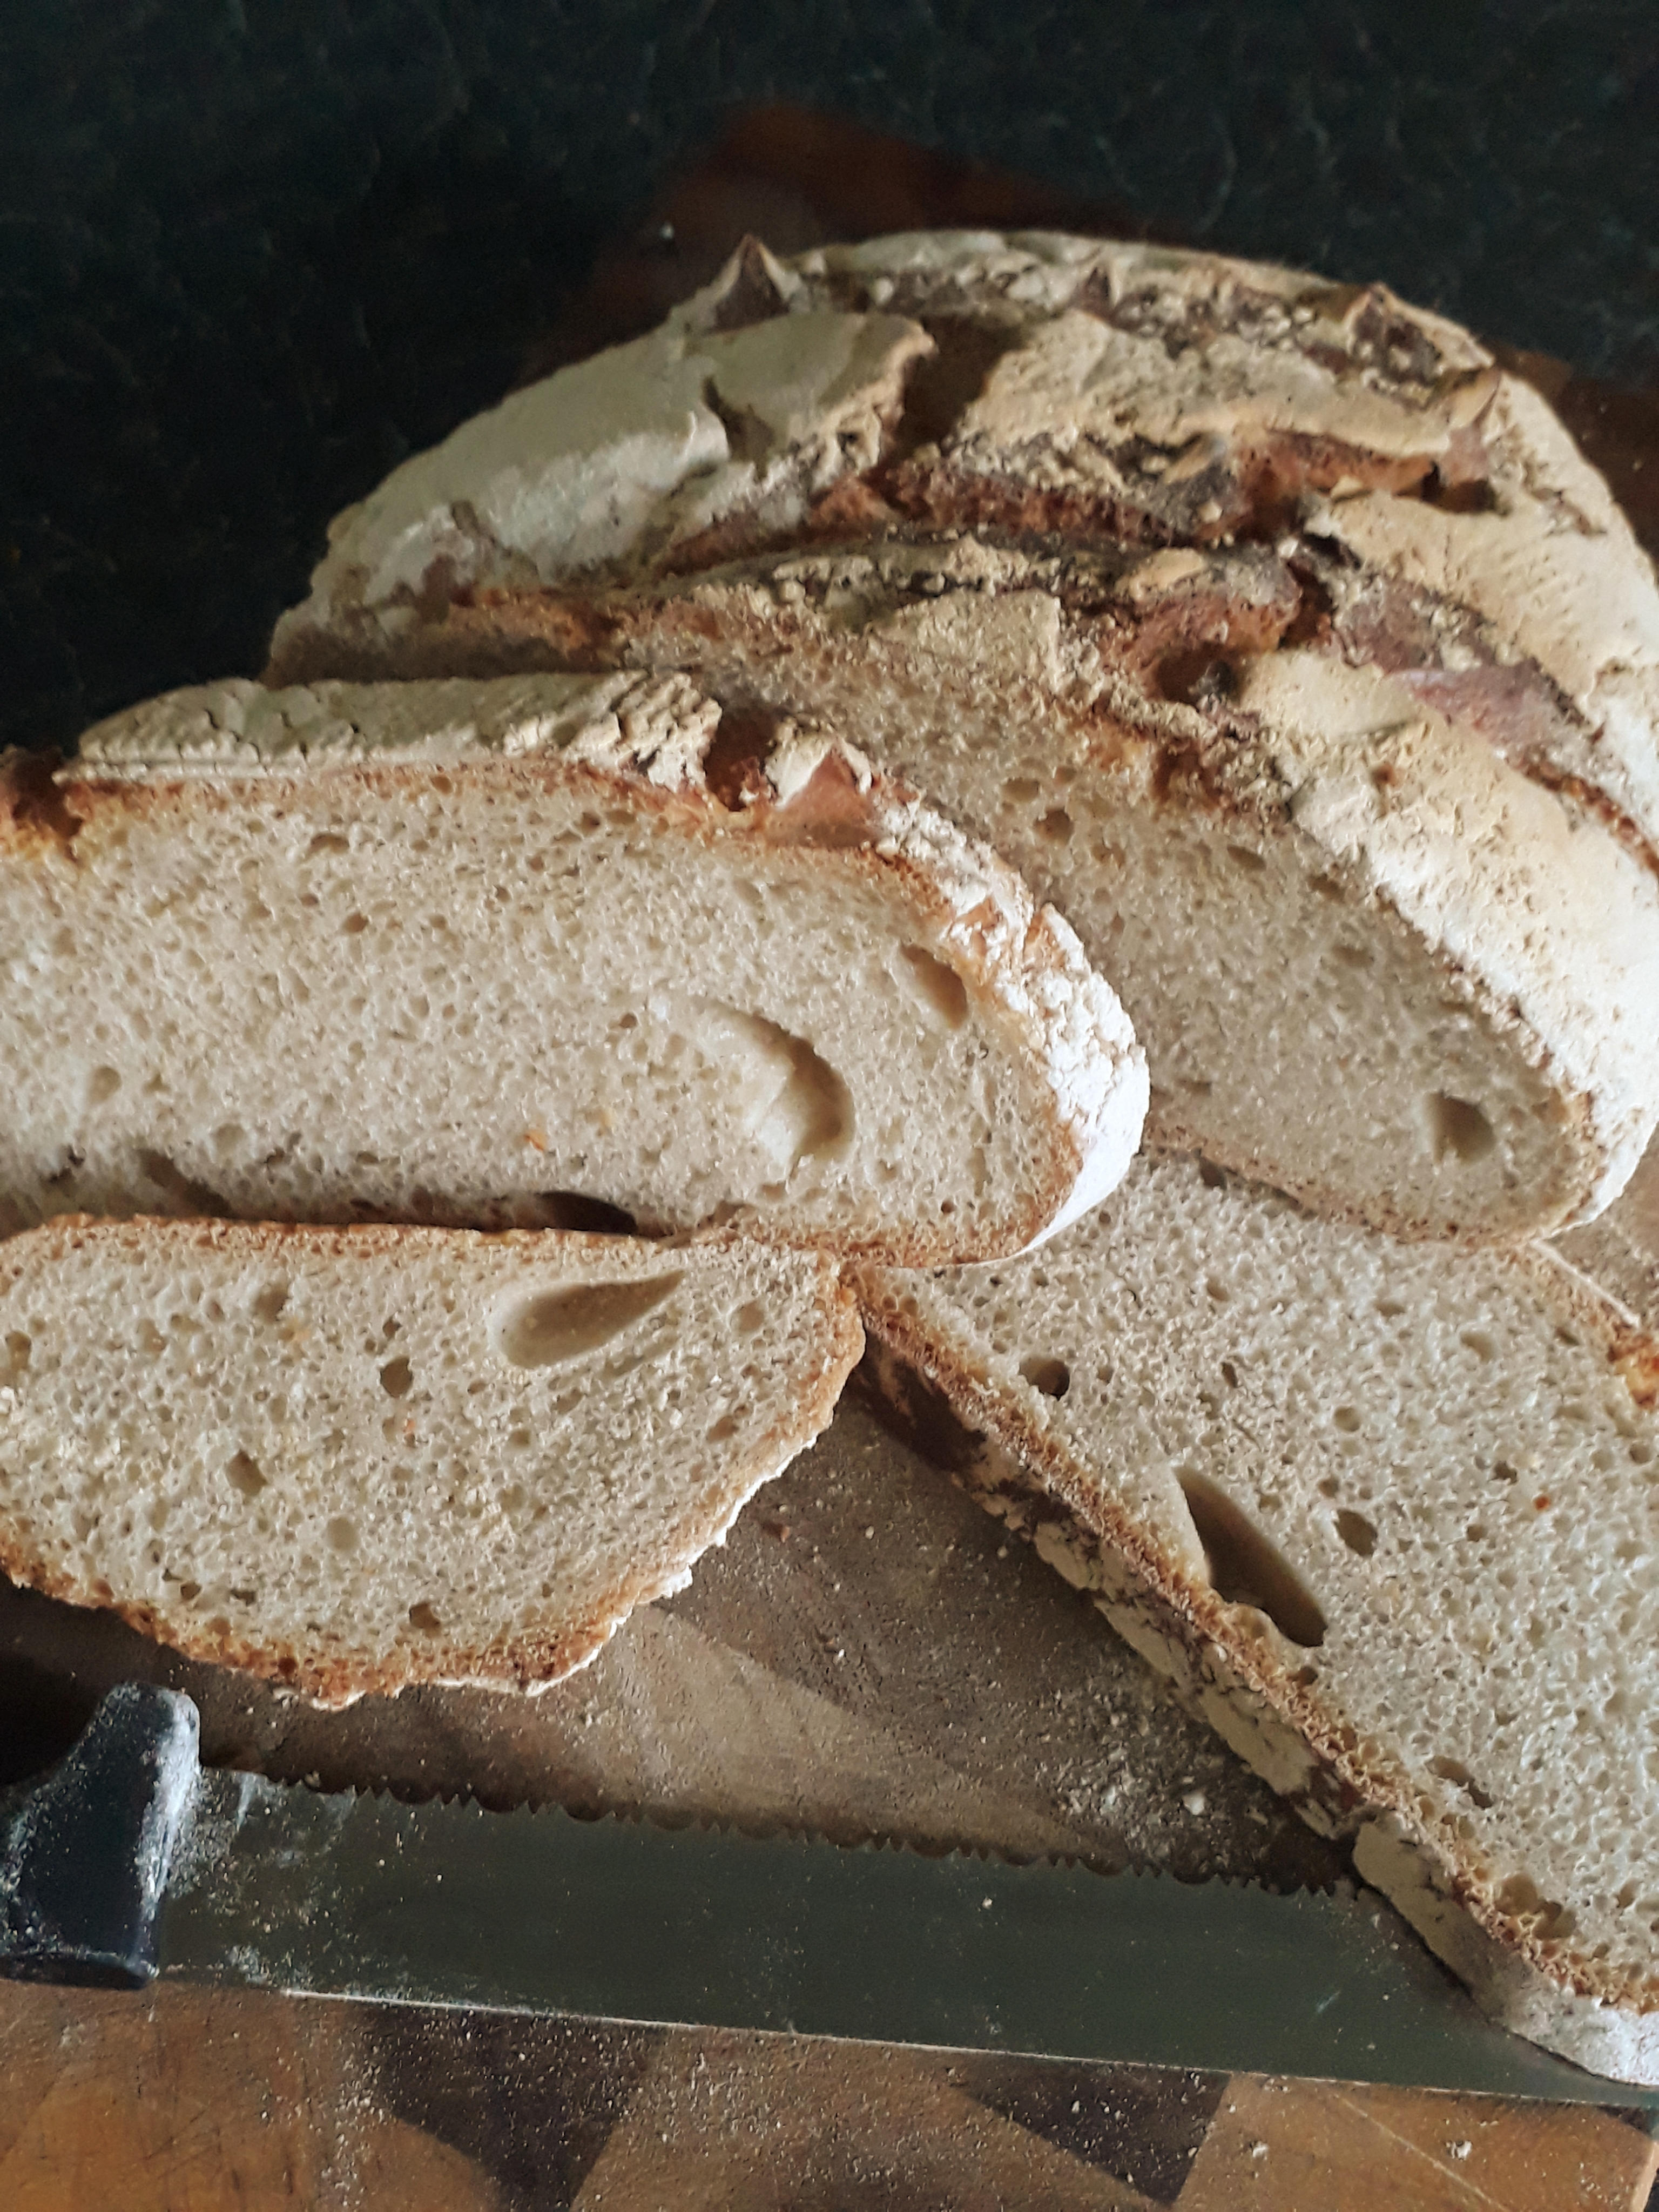
Sourdough Bread - long method, very tasty. Preferred Longer Recipe
Sourdough Bread
Makes 2 loaves
This is the tastiest bread I've made but it has a lot of stages that are organised into one long day in the kitchen - great if you have a few minutes every now and then to attend to it. Pictures of two loaves baked a day apart:
First loaf - nice and sour, good rise and nice crumb.
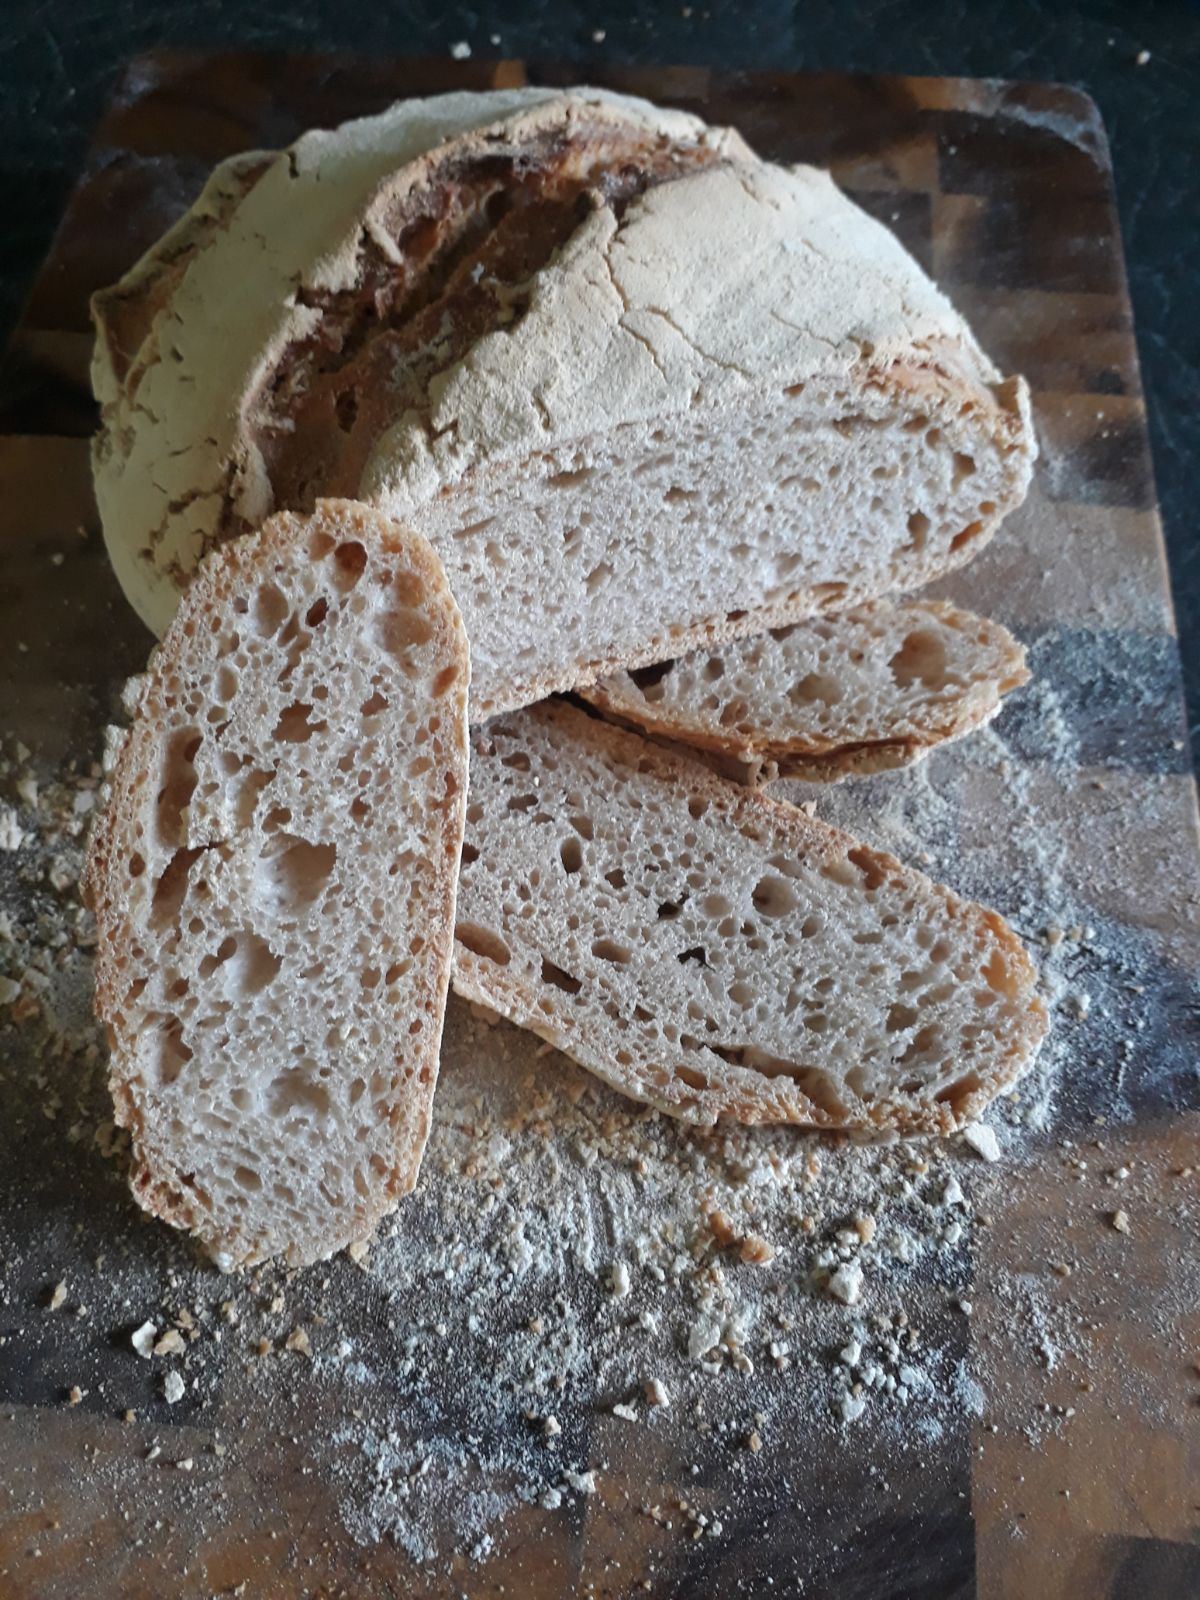
second loaf - best yet, lovely taste, crust a little hard maybe.
Ingredients:-
For the leaven:
- 1 tablespoon active sourdough starter
- 75 grams (1/2 cup) all-purpose flour or bread flour
- 75 grams (1/3 cup) water
For the dough:
- 1 tablespoon salt
- 350 grams water
- 700 grams (5 1/2 cups) all-purpose flour or bread flour
Equipment
- Small mixing bowl
- Large mixing bowl
- Plastic wrap or other covering for the bowls
- Spatula
- Pastry scraper
- Bread proofing baskets, colanders, or mixing bowls
- Dutch ovens or large heavy-bottomed pots with lids
- Lame, sharp knife, or serrated knife
Method:-
Two days before baking
- Make sure your sourdough culture is active: If your sourdough has been in the fridge, take it out 2 to 3 days before you plan to bake. Feed it daily to make sure it's strong and very active before you make the bread.
- Make the leaven (overnight):
- The night before you plan to make the dough, combine a tablespoon of active sourdough culture with the flour and water for the leaven. Mix thoroughly to form a thick batter. Cover and let stand at room temperature overnight, for about 12 hours.
One day before baking, early morning
- Test that the leaven is ready:
- Dissolve the salt:
- Mix the leaven and water:
- Add the flour:
- Rest the dough (30 minutes, or up to 4 hours):
After 4 hours, lunchtime on day before
- Mix in the salt:
- Begin folding the dough (2 1/2 hours):
Late afternoon on day before baking
- Let the dough rise undisturbed (30 to 60 minutes):
Teatime on day before baking
- Divide the dough:
- Shape the dough into loose rounds:
- Rest the dough (20 to 30 minutes):
Early evening day before baking
- Prepare 2 bread proofing baskets, colanders, or mixing bowls:
- Shape the loaves:
- Transfer to the proofing baskets:
- Let the dough rise (3 to 4 hours, or overnight in the fridge):
Day of baking
- Heat the oven to Gas Mark 9 (as hot as possible)
- Transfer the loaves to the Dutch ovens:
- Score the top of the loaf:
The bake, 3 sections
- Bake the loaves for 20 minutes:
- Reduce the oven temperature to Gas Mark 8 and bake another 10 minutes.
- Remove the lids and continue baking 15 to 25 minutes:
- Continue baking until the crust is deeply browned; aim for just short of burnt. It might feel a bit unnatural to bake loaves this fully, but this is where a lot of the flavor and texture of the crust comes in.
Finally eating
- Cool the loaves completely: When done, lift the loaves out of the pots using a spatula. Transfer them to cooling racks to cool completely. Wait until they have cooled to room temperature before slicing.
- Recipe Notes
- Whole-wheat sourdough: You can replace up to half of the all-purpose flour with whole-wheat or whole-grain flour.
- All-purpose vs. bread flour: Bread flour will give your bread a sturdier, chewier texture and a loaf that's easier to slice. Loaves made with all-purpose flour will be a bit more delicate, especially when you cut them, but still work just fine.
- If your loaf sticks to the proofing basket: This still happens to me all the time! It's annoying, but not the end of your sourdough dreams. If some of the dough stays stuck to the lining of the proofing basket, try to gently disengage it or pinch it away with your fingers. Fold a pinch of dough over the tear and bake as usual. The crust will look a little rough where it was torn, but the bread will still taste delicious.
- Adapted from Tartine Bread
- Details
- Written by Adrian
- Category: Breads
- Hits: 2029
Page 2 of 6